Necromancer Aurabot Support Build Guide (PoE Expedition 3.15)
Introduction
Due to the latest balancing changes, we do not recommend playing this build anymore, as it does not meet the high standards we apply to our guides in terms of fun and performance. We are leaving it up as a reference and it might be revived in a later patch.
This guide has mainly been written as a follow-up to our Group Play guide and covers everything there is to know about Aurabot support as a Necromancer. It is important for you to realize that this build does not function by itself and relies on another player to do damage and therefore is not SSF Viable.
Whereas this build has existed for the longest of times, it has changed a lot in recent patches and most of all in the 3.10 Delirium Patch with the introductions of Cluster Jewels. This has been further optimized in 3.11 Harvest League. This makes the build a little bit more complicated to gear on the high end but it has certainly gained a fair bit of strength. We will be covering both the basic version, that has been around for years and still packs quite a punch, as well as the Cluster jewel variant, which is outright broken (in a good way).
Changes to Aurabots following the change to Mortal Conviction in 3.7.0. Legion League made it so we are now a little bit more pressured for gear. Mortal Conviction used to give us 50% Less Mana Reserved, making it a lot easier to run all the Auras. Then again, running around with all auras in game and 15K Energy Shield on a budget might have been a tad too strong.
Don’t you worry though, even if this build is impossible to play solo, it is amongst the tankiest characters in the game, combining really high effective HP pool with high resistances and other defensive layers. On top of that, every DPS will be happy to have you next to them.
Pros & Cons
Pros
+ Excellent build to play with your friends or in groups
+ The easiest and most straightforward build to play out of the group-builds
+ Incredibly tanky through high Energy Shield, Dodge, and Spell Dodge and very high Elemental Resistances
Cons
– Can’t be played alone since it deals no damage
– Playstyle can be a little boring to some if you don’t fancy keeping all buffs up
Echoes of the Atlas Expansion Updates
Echoes of the Atlas introduced the long overdue nerfed to Aura-stackers, which inevitably also hit other builds that wanted to stack Aura Effect from Cluster Jewels. This build’s Cluster Jewel variant does lose about 28% reduced Aura Effect, and, overall, the main impact that it has on the build is that it loses a little bit of Maximum Resistance. I do think, though, that you are completely fine and I don’t think it’s super impactful. I do, however, feel like it’s a little sad that builds like a genuine Aurabot also got hit by nerfs that are not meant for them.
The upside to this is that, due to Harvest and Aura-stackers not being a thing anymore, I expect the Cluster Jewels to become more widely available and a lot cheaper! So, that at least is nice. All in all, I expect the build to remain just as potent as it was before, and you should definitely not notice any differences while supporting your friends.
Playstyle, Mechanics, and Strengths
While a lot of players think Support characters don’t really do much, they are actually amongst the most challenging builds to play in the entire game.
An Aurabot’s job is pretty hard to succeed at. First of all, you are the main looter of the group. Given that there is a tremendous amount of loot dropping (most of which is currency) that you have to pick up, you’re going to need to be fast on the fingers and accurate on the mouse to pilot this character to success, since you obviously never want to be behind your group, picking up loot.
The reason you don’t want to be left behind is because you are the group’s most reliable source of damage. You can’t be countered by monsters that are resistant to curses or maps that have reduced curse effects. On top of that, your Damage Dealer only uses “%increased damage” affixes and passive skills which means he has no base flat damage without you.
On top of all that, you’re also the character who has the most aura effect scaling and hence will be using  Vaal Grace. This skill benefits a tremendous amount from Aura Effect, as it has really high base numbers to start from. Starting at 34% Attack and Spell Dodge we can reliably get it to be a 70% Dodge aura. Anyone who’s using a
  Quartz Flask in your group will therefore be Dodge Capped.
The reason why Dodge cap is so overpowered, especially in a group scenario, is because of how the damage calculations work in PoE. Whenever an attack or spell hit comes in, it will first check your appropriate dodge chance. This happens before any other mitigation, so 75% of all incoming damage would therefore be dodged before it gets either mitigated by Evasion, or later Block chance, and finally Life, Energy Shield and Resistances. It is safe to say that during  Vaal Grace with the appropriate Aura Effect, your group is close to impervious to damage. We will be on the lookout to optimize our
  Vaal Grace uptime as a result.
Finally, when you still have time after occupying yourself with all of the above, you want to  Smite monsters. Smite is the strongest offensive “aura” you have, but it is circumstantial as you’re going to need to hit something to make it work and it doesn’t have the longest of durations.
Passive Skill Tree, PoB, and Gem Links
You can find an optimized Path of Building here. Every build I release will use the community fork of Path of Building, which is maintained and updated in a much more regular fashion than the original one. You can find PoB’s Fork, by LocalIdentity, here.
If you are not comfortable with Path of Building, we also have a PoePlanner for you. Do note that PoE Planner does not support Cluster Jewels and some specific unique jewels and it is highly recommended you install Path of Building to follow builds most optimally.
More information about the Passive Skill Tree, as well as all the Gem Links can be found on our dedicated page.
Ascendancy, Bandits, and Pantheons
All the information you would ever need about your ascendancy, bandits and pantheons can be found on our dedicated page.
Summary of Gear / TL;DR
As a cookie cutter selection, we’ll opt for the most standard of Aurabots and its gear. For more information, please refer to our Gear, Jewels and Flasks Page.
Our recommendation:
| Item Slot | Item Name |
| Head |  Alpha's Howl Alpha's Howl |
| Amulet |  Presence of Chayula Presence of Chayula |
| Chest | 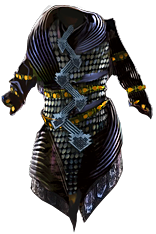 Shavronne's Wrappings Shavronne's Wrappings |
| Gloves | Rare  Sorcerer Gloves Sorcerer Gloves |
| Boots |  Sin Trek Sin Trek |
| Belt |  Bated Breath Bated Breath |
| Rings |  Lori's Lantern & Rare Lori's Lantern & Rare  Moonstone Ring Moonstone Ring |
| Weapon |  Ephemeral Edge Ephemeral Edge |
Questions & Support
I made it a habit to check all comments in my guides on a daily basis. Obviously, there might be occurrences where getting a reply might take longer but I really do try to get back to you as soon as possible. I prefer you making remarks, suggestions or asking questions that way as it allows others to read through the comments, providing them with a potential answer to their question, without having to wait for me again. If I have somehow missed your question, you can try reaching me on our Discord.
If you enjoy my content to such an extent that you’d like to support me and my work, I have a Patreon you can check out. At no point should you feel pressured to contribute, but if you do, your support means more to me than you will ever imagine.
Leveling
Just to refresh your memory, remember that this build is not to be leveled or played alone. To help you in the leveling process, you should check out our selection of leveling guides.
- Our step-by-step leveling walkthrough, which allows even more experienced players to save time and speed through the leveling process.
- Our guide to Unique Items for leveling, which helps you gear up your characters for the leveling process.
- Our beginner leveling guide, which answers many of the questions new players might have and will set you on the right path.
Getting to Brutus
For starters, create a Witch in whichever league you want to start. (optional: you can create a Scion and kill Hillock real fast to be able to store the ###item:Onslaught-Support### in your stash so you can use it on your Witch. The Witch class can’t access this gem until Act III otherwise).
You will want to start out by buying two wands from the vendor. On top of that you want to buy an  Explosive Trap as well. After you’ve run the Mud Flats with your group, you’ll proceed to kill Hailrake in the Tidal Island by yourself with
  Explosive Trap. Everyone in your group will want to do this solo, because Hailrake is guaranteed to drop a
  Portal Scroll and we really like those.
From there on, you’ll be able to pick up your first  Quicksilver Flask and a
  Frost Bomb from your quest rewards. You should be able to just farm experience while someone else tries to make it to Brutus. One
  Frost Bomb and a single
  Explosive Trap should kill most packs. After killing Brutus, you will be adding an
  Added Lightning Damage Support to your
  Frost Bomb links.
Make sure to pick up a  Flame Dash at some point between Brutus and Merveil. From here on, again, you’ll be sticking with this until we are Level 12 and have killed Merveil.
Changes at level 12
After we’ve killed Merveil we will try to have the necessary links and currency to get ourselves the following:
Additionally we can use  Summon Skitterbots and
  Herald of Thunder to supplement our damage until level 24. After we’ve set ourselves up for success till level 24, we’re going to be looking for the one item we absolutely need: a 4-link with 3 red sockets and 1 blue socket.
The swap to full support at level 24
At level 24, we want to link:
This will complete our transition to support. Alongside those two offensive Auras, we are also going to be running a  Purity of Elements to help cap our elemental resistances.
To be able to run these aura’s and transition to support, you need a couple of things set up. You need to run Library to get hold of a  Generosity Support and you need to ask one of your group members to pick you up the aura gems. If you can’t accumulate them through quest rewards you’re going need a
  Orb of Chance per missing gem.
At level 24, your skill tree should look something like this to make sure you can run all the Mana reservation. Do note that the 3 Damage nodes we picked up are to be respected as soon as we get respect points from the leveling.
Adding one more aura
Level 55 and onward is our next upgrade so until then you should have felt fine with what you were doing. At this point you should have a passive skill tree that looks like this.
After you complete the Wings of Vastiri quest in Act8, you’ll be able to pick up a ###item:Conquerors-Efficiency###. After you’ve socketed that into the empty jewel socket, you’re going to be able to add one aura to your repertoire.
While there’s a variety of options here, we recommend it to be  Grace. Grace adds tremendous amounts of survivability in the earlier stages of the game as monster accuracy scales with area level. Getting a chunk of flat Evasion will basically make you immune to attacks till we enter zone levels of 70 and higher.
We recommend you to keep this setup until you’re ready to make a full switch to Low-Life. This typically never happens before level 68 as that is the highest level requirement you’re going to be having on any piece of gear. You will at least need a 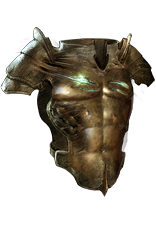 Solaris Lorica,
 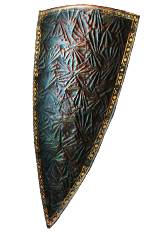 Prism Guardian,
  Lori's Lantern,
  Alpha's Howl,
  Ephemeral Edge, and a couple of solid rare Energy Shield pieces to be able to survive.
Here’s a PathOfBuilding that could mimic a day one early mapping support. This is the roughest part of your journey, as flat Energy Shield is hard to come by at this stage. Having 3K Energy Shield and solid layers of defense should last you at least for a couple of hours though until we can afford a decent pair of  Sin Trek or until we find a little bit better Energy Shield pieces.
FAQ
What Are My Most Important Upgrades?
If we take a look at the starting transition gear, I would say it’s both a  Shavronne's Wrappings and an anointed
  Presence of Chayula. When you swap to these, you’d be surprised how bad the other pieces of gear are able to be without it causing you much of an issue.
Even at the very most basic levels of gear and level 80 overall, these two items would put you at an easy 7K Energy Shield while running all our damage and defensive auras. That means we are pretty much done getting upgrades until their prices have dropped to just a couple of  Chaos Orb.
Both of these might be expensive but I would argue they’re probably worth a combined 300  Chaos Orb whenever you have those. Having a super tanky support enables your mapping group to go much faster and will make those chaos back in no time.


 Lightning Trap
 Multiple Traps Support
 Wrath
Wrath Anger
Anger